Yes, you can grow vegetables indoors with grow lights, and it works better than most people expect. Leafy greens, herbs, microgreens, and compact fruiting plants like dwarf tomatoes and peppers will all produce real harvests under the right setup. The catch is that results depend heavily on choosing the right light intensity, spectrum, and photoperiod for each crop. For strategies specific to low-light conditions, see our guide on how to grow plants indoors with little light. Get those three things right and you have a genuinely productive indoor garden. Get them wrong and you end up with pale, stretched plants and disappointment. This guide walks through everything you need to plan, build, and run an indoor vegetable setup using grow lights, with real numbers, honest tradeoffs, and practical steps.
How to Grow Vegetables Indoors with Grow Lights: Practical Guide
What you can realistically expect from indoor vegetable growing
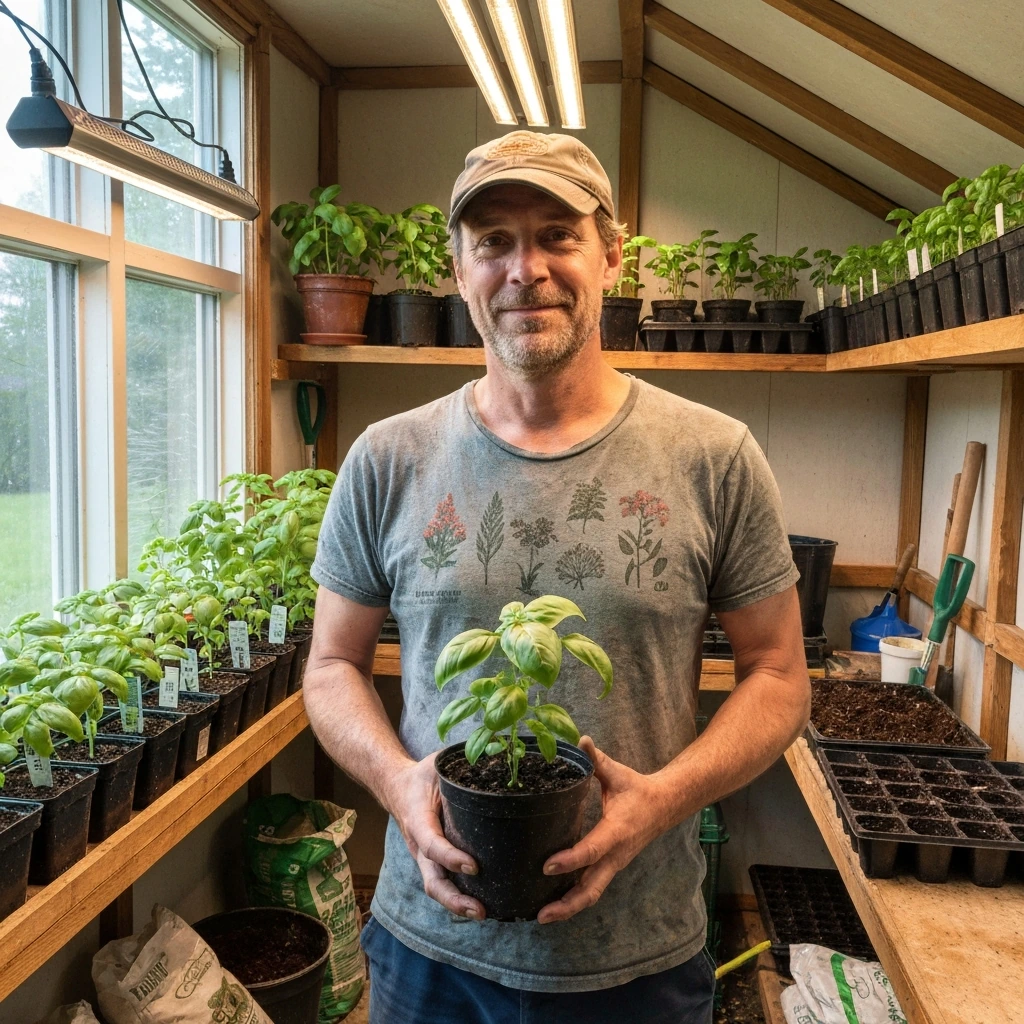
The honest version: grow lights make it completely viable to grow food indoors year-round, but it is not a free lunch. You are replacing the sun with electricity, so energy cost is real, and some crops are far more forgiving than others. Leafy greens, herbs, and microgreens are the easiest wins. They have modest light requirements, short cycle times, and produce harvestable food within two to four weeks. Compact or determinate tomatoes and peppers can be done indoors but demand much higher light levels, more vertical space, and manual pollination. Expect smaller plants and slower growth than an outdoor summer garden, but steady, consistent production regardless of season or weather.
One thing I learned early: the biggest mistake beginners make is underpowering their setup. A cheap LED strip positioned too high gives you leggy, yellow plants and almost nothing to harvest. Once I started measuring PPFD (more on that below) and matched my fixture to the crop's actual needs, everything changed. The plants looked different within a week. So before you buy anything, get clear on what you want to grow and what light level that crop actually needs.
Which vegetables grow well under lights (and which ones will frustrate you)
Not every vegetable is a good candidate. The ones that thrive under grow lights are generally compact, fast-growing, and have moderate light requirements. The ones that struggle are large, sprawling, deep-rooted crops like corn, squash, or full-size indeterminate tomatoes. Here is a practical breakdown of what works and what to expect.
Leafy greens and salad crops
Lettuce, spinach, arugula, kale, Swiss chard, and mixed salad greens are your best friends indoors. They have relatively low light requirements (a Daily Light Integral of roughly 12 to 17 mol per square meter per day is the research-backed sweet spot for high yield and quality), short crop cycles of 30 to 45 days from transplant, and they tolerate the slightly cooler, drier conditions of most indoor spaces. Controlled-environment research shows that hydroponic lettuce yields around 2.8 kg per square meter per harvest cycle under well-managed conditions, which is genuinely useful production from a single shelf.
Herbs
Basil, cilantro, parsley, chives, mint, and thyme all do well under grow lights. Basil in particular responds beautifully to red-dominant full-spectrum LED light. Most culinary herbs want similar DLI to leafy greens, around 12 to 16 mol per square meter per day. You can harvest continuously with a cut-and-come-again approach, making herbs one of the best value crops per square foot of shelf space.
Microgreens
Microgreens are almost too easy indoors. They need lower light levels than mature plants, cycle in 7 to 14 days from seeding to harvest, and can be stacked in trays to maximize your footprint. Research from 2026 reports fresh-weight yields for arugula microgreens around 530 grams per square meter per cycle, and broader microgreen trials show species-specific fresh-weight yields typically ranging from 300 to 700 grams per square meter per cycle. That is a meaningful amount of nutritious food from a small shelf.
Compact tomatoes and peppers
Dwarf or determinate tomato varieties (like Tiny Tim, Tumbling Tom, or Micro Dwarf types) and compact peppers can be grown indoors with grow lights, but they need significantly more light than greens. Research and production guidance targets canopy PPFD of 300 to 600 micromoles per square meter per second for good fruit set, which translates to a DLI of roughly 18 to 30+ mol per square meter per day. That means more powerful fixtures and longer light schedules. They also need hand-pollination indoors since there are no insects or wind to do the job. Expect smaller yields than outdoor plants, but real, edible fruit. If you are curious specifically about growing tomatoes under lights, the process and expectations are worth exploring in detail.
| Crop | Target PPFD (µmol/m²/s) | Target DLI (mol/m²/d) | Typical cycle time | Difficulty |
|---|---|---|---|---|
| Lettuce / salad greens | 150–250 | 12–17 | 30–45 days | Easy |
| Culinary herbs | 150–250 | 12–16 | Ongoing (cut-and-come-again) | Easy |
| Microgreens | 100–200 | 8–12 | 7–14 days | Very easy |
| Spinach / kale | 150–250 | 12–17 | 30–50 days | Easy |
| Compact / dwarf tomatoes | 300–500 | 18–25 | 70–90 days to first fruit | Moderate–Hard |
| Compact peppers | 300–500 | 18–28 | 80–100 days to first fruit | Moderate–Hard |
How grow lights actually work: spectrum, PAR, PPFD, and why efficiency matters
Plants do not care about lumens or watts. They respond to photons in a specific wavelength range called PAR, which stands for Photosynthetically Active Radiation and covers 400 to 700 nanometers. Think of PAR as the portion of the light spectrum that plants can actually use for photosynthesis. Lumens, which is how we measure light for human vision, weight the spectrum toward green-yellow wavelengths where our eyes are most sensitive. Those wavelengths matter less to plants than red and blue, so lumen ratings from fixture packaging are mostly irrelevant for growing food.
PPFD (Photosynthetic Photon Flux Density) is the measurement you actually care about. It tells you how many photons in the PAR range are landing on a square meter of canopy every second, expressed as micromoles per square meter per second (µmol/m²/s). A higher PPFD means more photons reaching your plants. But a snapshot PPFD reading does not tell the whole story because plants integrate light over the whole day. That brings us to DLI.
DLI (Daily Light Integral) is the total amount of PAR light your plants receive in a 24-hour period, expressed as moles of photons per square meter per day (mol/m²/d). The formula is straightforward: DLI = PPFD × hours of light × 0.0036. So if your fixture delivers 200 µmol/m²/s at canopy level and you run it for 16 hours, your DLI is 200 × 16 × 0.0036 = 11.5 mol/m²/d. That sits just at the lower end of what leafy greens want. Bumping to 18 hours gets you to 13.0 mol/m²/d, right in the productive zone. This formula is your planning tool.
PPE (Photosynthetic Photon Efficacy) is the efficiency metric for fixtures, expressed in micromoles of PAR photons per joule of electricity (µmol/J). Modern high-quality LED horticultural fixtures commonly achieve 2.5 to 3.0+ µmol/J. Older HPS fixtures typically measured around 1.6 to 1.8 µmol/J in independent lab testing (Nelson and Bugbee, 2014). Higher PPE means more light per dollar of electricity, which matters more than most people realize once you start running lights 16 hours a day.
On spectrum: red photons (around 630 to 680 nm) drive photosynthesis efficiently, while blue photons (around 450 to 470 nm) regulate plant shape and stomatal function. A fixture with no blue produces large, floppy plants with poor structural integrity. Too much blue, as Bugbee lab research showed, can actually reduce leaf area and biomass in lettuce compared to red-dominant spectra at the same PPFD. For most vegetables, a broad-spectrum white LED with a red-leaning bias and roughly 10 to 20 percent blue works well. Far-red wavelengths (700 to 750 nm) can enhance canopy photosynthesis and are worth considering in fixtures designed for fruiting crops, though they are not counted in the standard 400 to 700 nm PAR definition.
LED vs HPS vs fluorescent: which light type should you use?
For most home growers starting today, full-spectrum LED is the right answer. For practical, step-by-step instructions on how to use led grow lights for indoor plants, see a dedicated guide for setup, mounting heights, and schedules. The technology has moved on significantly in the last decade and modern LEDs outperform every other option on efficiency, lifespan, and heat management. But the other options are not completely obsolete, so here is a fair comparison.
| Light type | Typical PPE (µmol/J) | Heat output | Lifespan | Cost (upfront) | Best use |
|---|---|---|---|---|---|
| Modern horticultural LED | 2.0–3.2 | Low to moderate (convective, no IR radiation to canopy) | 50,000+ hrs | Moderate–High | All crops, all scales |
| HPS (High-Pressure Sodium) | 1.6–1.8 | High (significant radiant and convective) | 10,000–15,000 hrs | Low–Moderate | Large spaces; legacy setups |
| CMH / LEC (Ceramic Metal Halide) | 1.7–2.0 | High (radiant) | 15,000–20,000 hrs | Moderate | Fruiting crops; full-spectrum quality |
| T5 fluorescent | 0.9–1.3 | Low–Moderate | 20,000 hrs | Low | Seedlings, microgreens, herbs |
| CFL (Compact Fluorescent) | 0.7–1.0 | Moderate | 8,000–10,000 hrs | Very low | Very small setups, supplemental only |
HPS lights were the industry standard for decades and are still used in large-scale greenhouse production. They are inexpensive to buy and produce a lot of photons. But they run very hot, require ballasts, emit substantial infrared radiation toward the canopy, and their efficiency (around 1.6 to 1.8 µmol/J in independent testing) is noticeably lower than modern LEDs. For a home setup in a spare room or closet, the heat load from HPS is a real problem and will drive up your cooling costs.
T5 fluorescent fixtures are genuinely useful for seedlings, microgreens, and low-light herbs because they provide gentle, even light with low heat and are cheap to buy. They fall short for fruiting crops and even for pushing leafy greens to maximum yield, because their PPE and maximum output are too limited. Think of T5s as a starter option or a specialized tool rather than a primary grow light for a serious vegetable setup.
When comparing LEDs, look for fixtures with published PPF (total photon output in µmol/s) and PPE (µmol/J) from independent or DLC (DesignLights Consortium) listed testing, not just watts. A fixture claiming 300 watts that only produces 500 µmol/s is far less efficient than one producing 750 µmol/s from the same draw. The DLC horticultural listing and UL 8800 certification are useful quality signals when evaluating fixtures.
Translating specs into a real layout for your space
Product specs can be confusing because manufacturers often list PPFD at a single center point at a specific height, which flatters the fixture. What matters to you is average PPFD across your whole growing area at canopy height. The rough formula: if you know a fixture's PPF (total photon output), blank" rel="noopener noreferrer">divide it by your grow area in square meters to get an approximate average PPFD, then apply a 10 to 20 percent reduction for edge losses and fixture-to-canopy optical inefficiency. Always validate with a quantum (PAR) meter if you are serious about results.
Research-grade quantum sensors from brands like Apogee (MQ-500 series) and LI-COR measure PPFD with around plus or minus 5 percent uncertainty, which is precise enough for any home setup. LI‑COR LI‑180 FAQ (PPFD/PAR definitions and instrument guidance) explains PPFD and PAR measurement basics, cosine correction, calibration uncertainty, and recommended logged‑sampling methods for quantum (PAR) sensors. Consumer-grade PAR meters are available for $50 to $150 and give you a reasonable ballpark. Take readings at multiple points across the canopy (at least 5 to 9 points in a grid) and average them. That average is what your plants are actually receiving.
Worked examples for common home setups
| Setup | Grow area | Target PPFD | Target DLI | Approximate fixture PPF needed | Example fixture draw |
|---|---|---|---|---|---|
| Single shelf (lettuce/herbs) | 0.6 m × 0.6 m = 0.36 m² | 200 µmol/m²/s | 12–14 mol/m²/d at 16–18 hrs | ~80–100 µmol/s | 30–50 W LED panel |
| 2×2 ft tray (microgreens/seedlings) | 0.6 m × 0.6 m = 0.36 m² | 120–150 µmol/m²/s | 8–11 mol/m²/d at 16 hrs | ~55–70 µmol/s | 20–35 W LED strip/panel |
| 4×4 ft bench (mixed greens) | 1.2 m × 1.2 m = 1.44 m² | 200–250 µmol/m²/s | 13–16 mol/m²/d at 16–18 hrs | ~320–400 µmol/s | 120–160 W LED fixture |
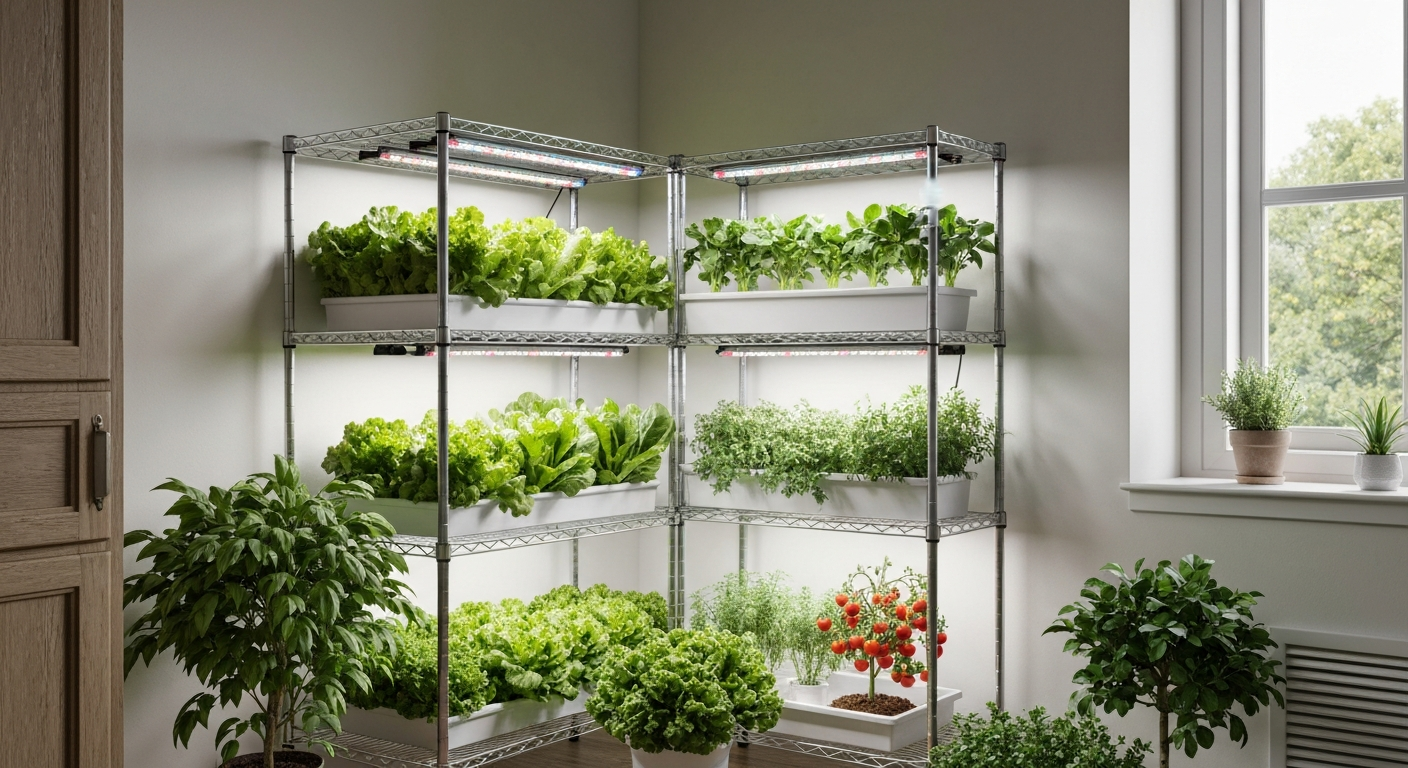
| Multi-tier 5-shelf rack (greens + herbs) | 5 × 0.6 m × 1.2 m = 3.6 m² total | 200 µmol/m²/s per tier | 13–14 mol/m²/d per tier at 16 hrs | ~80–100 µmol/s per tier | 30–50 W per shelf; 150–250 W total |
For a 4×4 setup growing compact tomatoes, scale the target PPFD up to 350 to 500 µmol/m²/s and recalculate: 1.44 m² × 400 µmol/m²/s = 576 µmol/s minimum, so you need a fixture or two fixtures delivering at least 600 to 700 µmol/s total. That corresponds to roughly 200 to 280 watts of quality LED. Notice how fruiting crops roughly double the fixture investment compared to leafy greens over the same footprint.
Picking fixtures and components: what to look for
The grow light market is flooded with misleading products. Here is what to actually look for when evaluating a fixture for vegetables.
- Published PPF (µmol/s) and PPE (µmol/J) from independent testing, not manufacturer estimates. DLC-listed products have third-party verified data.
- UL 8800 or ETL listing for electrical safety, especially important in humid growing environments.
- Driver quality: quality fixtures use name-brand drivers (Meanwell, Inventronics) with high power factor and protection ratings. Cheap drivers fail early and can be a fire risk.
- Dimmability: a 0–10V dimming interface lets you adjust output as plants grow or for different crops, which adds real flexibility.
- Daisy-chain capability: being able to link multiple fixtures from one controller simplifies wiring and dimming on a multi-shelf rack.
- Lensing and beam angle: wide-beam lenses (90 to 120 degrees) give more even coverage and allow closer mounting. Narrow-beam fixtures create hotspots and dark edges.
- IP rating: IP54 or higher means splash resistance, which matters when you are watering overhead.
- Thermal management: fixtures with passive heatsinks run cooler and last longer than poorly-vented enclosures. Check that the case is aluminum, not plastic.
For a single shelf or two-shelf setup, a bar-style LED fixture (often called a Samsung LM301 board or similar) with 30 to 60 watts per shelf and a published PPE of 2.2 µmol/J or better is a solid, cost-effective choice. For a 4×4 bench, look at purpose-built horticultural panels with 120 to 200 watts actual draw and a full PPFD map from the manufacturer showing uniformity across the footprint, not just the center peak. Avoid any fixture that only lists equivalent wattage or lumens without providing PPFD or PPF data.
Mounting height, spacing, and beam angles
Mounting height is one of the most controllable variables in your setup, and it has a big effect on both PPFD at canopy level and uniformity across the growing area. Moving a fixture higher reduces intensity but spreads the light more evenly. Moving it closer increases intensity but can create hotspots directly beneath the fixture and dark edges. The right height depends on the fixture's beam angle and your grow area.
- Low-power seedling and microgreen LEDs: 15 to 25 cm (6 to 10 inches) above canopy
- Standard leafy green panels (30–60 W per shelf): 20 to 35 cm (8 to 14 inches) above canopy
- Medium-power full-shelf fixtures (60–120 W): 30 to 50 cm (12 to 20 inches) above canopy
- High-power fruiting-crop fixtures (150–250 W): 45 to 75 cm (18 to 30 inches) above canopy
Always check the manufacturer's PPFD map at different hanging heights if one is available. If not, take your own grid readings. To avoid hotspots on a large bench, consider using two smaller fixtures positioned side-by-side with some horizontal spacing rather than one big central fixture. Overlapping footprints from two fixtures create much better uniformity than a single bright point source. For a 4×4 bench, two 60 to 80 watt bar fixtures mounted side by side at 35 to 40 cm above canopy will usually outperform one 150 watt center-mounted panel for canopy evenness.
For multi-tier racks, the shelf above acts as the mounting surface for the light serving the shelf below. Standard wire shelving at 40 to 50 cm shelf-to-shelf spacing works well for low-growing crops like lettuce, herbs, and microgreens when paired with compact LED fixtures. If you want to grow taller plants like peppers or tomatoes on any tier, that tier needs at least 60 to 75 cm of vertical clearance above the canopy, which means giving up one of your shelves or using a taller rack.
Photoperiod, timers, dimming, and light scheduling
How many hours per day you run your lights is as important as how bright they are. Plants need a dark period for respiration, hormonal regulation, and in some crops, to trigger flowering. Running lights 24 hours a day is not only wasteful but can stress or confuse plants. The right photoperiod depends on the crop.
| Crop | Recommended photoperiod | Notes |
|---|---|---|
| Lettuce and leafy greens | 14–18 hours | Day-neutral; longer days increase DLI and speed growth without flowering issues |
| Culinary herbs (basil, cilantro, parsley) | 14–16 hours | Basil can bolt under very long days; 14–16 hrs is a safe balance |
| Microgreens | 14–18 hours | Tolerant of long days; short cycle means photoperiod choice mainly affects speed |
| Compact tomatoes | 14–18 hours | Day-neutral fruiting; more hours increases DLI and potential yield |
| Peppers | 14–16 hours | Sensitive to very short days; 14–16 hrs supports flowering and fruiting |
| Mint, chives, perennial herbs | 12–16 hours | Most are day-neutral; 14 hrs is a reliable default |
A mechanical or digital outlet timer is not optional; it is essential. Consistent daily light schedules keep plants on a reliable rhythm and prevent you from accidentally forgetting to turn lights off for days. Smart plug timers let you set precise on/off times and monitor energy use from your phone, which I find genuinely useful for tracking electricity costs per crop. Set the timer before you plant anything and do not change the schedule mid-cycle unless you are deliberately adjusting for a reason.
Dimming is more useful than it sounds. During germination and early seedling stages, plants need far less light than mature plants, so running your fixture at 40 to 60 percent is appropriate and saves electricity. As plants mature, ramp intensity up gradually over a week rather than jumping from low to full power, which can shock seedlings adapted to lower light. For fixtures with a 0–10V dimming port, you can do this precisely. For fixtures without dimming, raising the mounting height gives you a rough equivalent.
One practical tip: if you are running lights during the day, set them to overlap partially with natural light coming through windows. If you are running a fully light-controlled room with no windows, scheduling the light period during daytime hours also helps manage room temperature, since the heat from fixtures during the day can be offset by ambient cooling from your home's HVAC more easily than overnight heat buildup.
Heat, ventilation, and electrical safety
Every watt of electricity your fixture draws eventually becomes heat in your growing space. The engineering rule of thumb is 3.412 BTU of heat per watt per hour. A 200-watt fixture running 16 hours a day adds about 1,100 BTU per hour to the room during its on cycle. In a small spare room or closet, that adds up quickly. Most LED fixtures discharge this heat as convective air heat from their heatsinks rather than as infrared radiation downward onto the canopy (unlike HPS), which is better for plant comfort but still means you need airflow.
For any setup larger than a single shelf, add a small USB or clip-on fan to circulate air around the canopy. This serves three purposes: it removes heat from around the plants, strengthens stems through gentle mechanical stimulation, and reduces the humidity pocket that builds up around leaf surfaces, which lowers risk of fungal diseases like powdery mildew and botrytis. Keep room temperature at the plant level between 18 and 26 degrees Celsius (65 to 79 F) for most vegetables. If temperatures push above 28 C under lights, you need more ventilation or a smaller fixture.
On electrical safety: moisture and electricity are a dangerous combination in any growing setup. Use fixtures with at least IP54 splash resistance. Keep power strips and timers elevated off the floor and away from water sources. Do not overload circuits: a 15-amp household circuit can handle about 1,800 watts continuously (at 80 percent loading), so be realistic about how many fixtures and pumps you are running. UL 8800-listed fixtures have been tested for horticultural use conditions, which includes moisture exposure testing. This is not a spec to skip on.
Are grow lights safe? What the evidence actually says
Two questions come up constantly: can grow lights cause cancer, and will they give you a tan? The straightforward answer to both is no, for the vast majority of horticultural grow lights used at home. Here is why.
Skin cancer and tanning are caused by UV-B radiation (280 to 315 nm) and to a lesser extent UV-A (315 to 400 nm). Standard horticultural grow lights, whether LED, HPS, T5, or CFL, are designed to produce PAR light in the 400 to 700 nm range. They emit little to no biologically significant UV. You will not tan under a standard plant grow light, and there is no credible mechanism by which normal PAR light from grow lights causes skin cancer. Specialized UV-supplemented fixtures for pest management or specific plant responses exist, but they are a niche category and clearly labeled.
Eye safety is a different matter. High-intensity LED grow lights can cause temporary visual discomfort, afterimages, and potential retinal fatigue from the intense blue and white light at close range. Looking directly at a high-power LED fixture at close range is uncomfortable and not advisable. Wear basic UV-protective or tinted safety glasses when working closely with intense fixtures, especially if you spend significant time adjusting or inspecting plants. This is a sensible precaution, not a serious health risk for normal use.
High-power HPS fixtures do emit some UV and should not be stared at directly. They also run very hot and can be a burn risk if touched. For home use, LED fixtures eliminate most of these concerns by running cooler and emitting no meaningful UV.
Growing media, containers, nutrients, and watering
Indoor vegetable growing under lights works in soil, but purpose-mixed soilless media or hydroponic systems are usually better choices. Soilless mixes (perlite-heavy, coco coir, or peat-based potting mix) drain more consistently, reduce fungus gnat problems common in dense soil indoors, and are easier to manage in containers. For containers, choose sizes appropriate to the crop: small 10 to 15 cm pots for herbs, 20 to 30 cm for compact peppers, and larger 30 to 40 cm containers or fabric pots for dwarf tomatoes. Larger containers hold more water and nutrients and reduce how often you need to water.
Nutrient management indoors is different from outdoor gardening because you are in full control of the root environment. For soil-based growing, a balanced slow-release granular fertilizer plus a diluted liquid feed every 1 to 2 weeks works well for greens and herbs. For fruiting crops, transition to a higher-potassium formula once flowers appear. For hydroponic systems, use a purpose-made hydroponic nutrient solution and monitor EC (electrical conductivity) and pH regularly: leafy greens prefer pH 5.5 to 6.5 and EC 1.2 to 2.0 mS/cm; fruiting crops prefer pH 5.8 to 6.5 and EC 2.0 to 3.5 mS/cm.
Watering frequency indoors under lights is higher than most beginners expect, because the combination of light-driven transpiration and drier indoor air pulls moisture from leaves and media quickly. Check soil moisture daily, especially in small containers. The classic finger-test works fine: if the top 2 cm of media is dry, water thoroughly until it drains from the bottom. Do not let containers sit in standing water for more than 30 minutes, as this promotes root rot.
Pollination, fruiting, and ripening
Leafy greens, herbs, and microgreens do not need pollination because you are harvesting leaves or sprouts before the plant flowers. But if you are growing tomatoes or peppers indoors, pollination is your responsibility. Outdoors, bees and wind do this automatically. Indoors, you need to replicate it.
Hand-pollination for tomatoes is simple and takes about 30 seconds per cluster. Once flowers are fully open (usually 1 to 3 days after the bud opens), gently tap the flower stem or use a small electric toothbrush held against the flower's stem to vibrate pollen loose. Do this daily during the flowering period. Alternatively, a small oscillating fan running for a few hours a day during flowering provides enough air movement to assist pollen transfer. Peppers are similar but generally even more forgiving and will sometimes self-pollinate with minimal intervention.
If you end up with green tomatoes that are not ripening, the most reliable approach is to harvest them once they have reached full size and have a slight color change at the blossom end, then ripen them off the vine at room temperature (ideally 18 to 21 C) away from direct light. If you're wondering whether a grow light will ripen green tomatoes, lights alone won't; room-temperature storage and ethylene exposure are what drive ripening will a grow light ripen green tomatoes. Ethylene gas produced by the tomato drives ripening; placing them in a paper bag with an apple or banana speeds the process. Do not put them in the refrigerator: below 13 C destroys the flavor compounds.
Pest management in an indoor grow
Closed indoor environments reduce some pest pressure (no slugs, most outdoor insects) but create favorable conditions for fungus gnats, spider mites, aphids, and occasionally thrips. Prevention is far easier than treatment. Start with clean, sterile growing media. Keep humidity below 70 percent relative humidity at canopy level. Inspect new plants before bringing them indoors. Yellow sticky traps placed near the base of your grow area catch adult fungus gnats and alert you to early aphid or whitefly presence before populations get out of hand.
For fungus gnats, which are by far the most common indoor grow pest, let the top 3 to 4 cm of media dry out between waterings, use yellow sticky traps, and if needed apply a Bacillus thuringiensis israelensis (Bti) drench to the media. For spider mites, increase humidity slightly (they thrive in hot, dry conditions) and treat early infestations with insecticidal soap or neem oil spray, being careful not to apply under hot lights, which can cause leaf burn.
Troubleshooting common problems
Leggy, stretched plants
Stretching (etiolation) is the most common symptom of insufficient light. Plants stretch toward the light source when PPFD at canopy level is too low. The fix is usually simple: lower the fixture closer to the canopy, switch to a higher-output fixture, or extend the photoperiod slightly to raise DLI. Check your actual PPFD at canopy level rather than guessing by fixture height. If you are at 50 to 80 µmol/m²/s when your crop needs 200, no amount of schedule tweaking will substitute for more light.
Yellowing leaves and nutrient deficiencies
General yellowing (chlorosis) of older lower leaves usually indicates nitrogen deficiency, especially in fast-growing leafy greens harvested continuously. Increase the frequency of liquid feed or switch to a higher-nitrogen formulation. Yellowing between leaf veins on young leaves (interveinal chlorosis) often points to iron or manganese deficiency, which in soilless media is frequently a pH problem: if pH is above 6.5 in a soilless or hydroponic system, iron becomes unavailable. Check and correct pH first before adding more micronutrients.
Low yields on fruiting crops
Low yields on indoor tomatoes or peppers usually trace back to one or more of: insufficient DLI (under 18 mol/m²/d), failed pollination, inconsistent watering, or overly vegetative fertilizer (too much nitrogen, not enough potassium and phosphorus at the flowering stage). Work through that checklist systematically before blaming the variety or the setup.
Light burn
Light burn appears as bleached, white-yellow patches on the topmost leaves closest to the fixture. This happens when PPFD at canopy is far above the crop's saturation point, usually from a fixture mounted too close. Raise the fixture, dim it if possible, or both. Lettuce and most greens will show stress above about 600 µmol/m²/s at canopy; fruiting crops can handle more but will still bleach above 800 to 1000 µmol/m²/s without CO2 supplementation.
Energy costs and whether it is worth it
Running grow lights has a real electricity cost that you should budget for honestly. A single-shelf 40-watt LED fixture running 16 hours a day consumes 0.64 kWh per day, or about 19 kWh per month. At an average US electricity rate of around $0.13 per kWh (2025 average), that is about $2.50 per month per shelf. A four-shelf rack with 40 watts per shelf runs around $10 per month. A more intensive 400-watt fruiting-crop setup running 16 hours costs about $25 per month in electricity alone.
The ROI question depends on what you value. For microgreens and herbs, the math can work out quite well: a single tray of microgreens worth $8 to $15 at retail can be produced in 10 to 14 days from a setup costing $2 per month in electricity. For lettuce, a well-managed 4×4 bench producing 2.8 kg per harvest cycle every 35 to 40 days replaces meaningful grocery purchases. For tomatoes, the economics are harder: the higher fixture cost, longer crop time, and marginal yield make it an enthusiast project more than a money-saver. Grow tomatoes because you enjoy the process and want fresh homegrown fruit in January, not because you are trying to undercut the supermarket.
Practical buying and installation checklist
- Decide on your grow space dimensions and the crops you want to grow. Use the PPFD and DLI targets in this article to define the light output you need.
- Calculate the minimum PPF required: multiply your target PPFD by your grow area in square meters, then add 15 percent for losses. Use that number to shortlist fixtures.
- Choose fixtures with published PPF and PPE data, DLC listing or UL 8800 certification, and a dimming option if your budget allows.
- Buy a basic PAR (quantum) meter or borrow one to verify actual PPFD at canopy level once installed. Do not rely on manufacturer center-point specs alone.
- Buy a digital outlet timer (mechanical or smart plug). Set your photoperiod schedule before planting.
- Mount fixtures at the correct height for your target PPFD. Take a grid of readings and adjust height or position for uniformity.
- Add at least one small fan for air circulation if the setup is larger than a single shelf.
- Use IP54-rated fixtures and keep all electrical components elevated and away from water.
- Set up your containers, media, and nutrient plan before seeding. Match container size to the crop.
- Start nutrients at half the recommended dose for seedlings, then ramp up as plants mature.
- Place yellow sticky traps to monitor for pests from day one.
- Track your electricity use over the first month and compare it to your harvest weight and grocery value. Adjust your setup based on real results, not expectations.
Indoor vegetable growing with grow lights is one of the most controllable forms of gardening you can do. You control every variable: light intensity, spectrum, duration, temperature, nutrients, and water. That is what makes it both technically interesting and genuinely productive. Start with leafy greens or microgreens, dial in your setup with real measurements, and expand from there. For a step-by-step beginner's walkthrough on how to grow indoor plants with grow lights, consult this practical guide for setup, scheduling, and troubleshooting. For a practical step-by-step tutorial on how to use grow lights for indoor plants, see this detailed guide. The learning curve is real but short, and once you understand what your plants are telling you, the whole process becomes surprisingly intuitive.
FAQ
Can you grow vegetables indoors with grow lights and what should I expect?
Yes. Many vegetables—especially leafy greens, herbs, microgreens, and compact/ determinate fruiting varieties (small tomatoes, peppers)—can be grown reliably indoors with grow lights. Expect faster, year‑round production with controlled environment benefits (less pests, predictable harvests) but smaller per‑fixture yields than a full greenhouse unless you use multi‑layer stacking. Success depends on delivering enough usable light (PPFD/DLI), appropriate spectrum, good root environment (containers/media/nutrients), ventilation/temperature control, and pollination for fruiting crops.
What do PPFD, PAR and DLI mean and how do I convert between them?
PAR (photosynthetically active radiation) is light plants use (400–700 nm). PPFD (µmol·m⁻²·s⁻¹) is the instantaneous photon flux in PAR hitting a surface. DLI (mol·m⁻²·d⁻¹) is total PAR photons per day. Conversion: DLI = PPFD × hours of light × 0.0036. Example: 300 µmol·m⁻²·s⁻¹ for 14 h → DLI = 300 × 14 × 0.0036 ≈ 15.1 mol·m⁻²·d⁻¹.
Which vegetables are realistic for home indoor growing and what yields can I expect?
Best choices: - Microgreens: short cycles (7–21 days), yields commonly ~300–700 g·m⁻² per cycle depending on species and density. - Leafy greens (lettuce, spinach, salad mixes): reliable; production varies with system and cycles; individual harvest cycles yield a few hundred grams to kilograms per m² depending on single vs multi‑harvest systems. - Herbs (basil, parsley, cilantro): do well; high harvests by successive cutting or continuous harvest. - Compact/determinate tomatoes and small peppers: possible but require higher light (PPFD/DLI), pollination and space; yields per plant are modest indoors. Expect much higher annual yields per floor footprint when you stack multiple layers.
What light levels should I target for different crops (PPFD / DLI)?
General targets (start points; adjust by cultivar): - Microgreens: PPFD ~100–250 µmol·m⁻²·s⁻¹; DLI ≈6–18 mol·m⁻²·d⁻¹. - Leafy greens/herbs: PPFD ~150–300 µmol·m⁻²·s⁻¹; DLI ≈12–17 (many growers run 12–16 h). - Fruiting crops (compact tomatoes/peppers): PPFD ~300–600 µmol·m⁻²·s⁻¹; DLI ≈18–30+. Higher PPFD can increase yield to a point; watch for photoinhibition and heat stress.
How do LED grow lights compare to HPS, CMH and fluorescent options?
LEDs: generally highest flexibility, higher electrical efficacy (PPE µmol·J⁻¹), long life, low radiant heat at fixture, dimmable and spectrally tunable. HPS: historically high PPF per lamp but lower electrical efficiency and high radiant heat; good for broad canopy in greenhouses. CMH (Ceramic Metal Halide) and T5 fluorescents: useful for seedlings/low‑light crops; lower efficacy and shorter life than modern LEDs. For home systems, LEDs are usually best due to efficiency, lower heat load, tunability and space suitability.
What spectrum should I choose (red/blue/far‑red/white)?
Practical guidance: - Leafy greens: broad white or red+white with ~5–20% blue to control compactness and stomatal function. - Microgreens/herbs: lower blue (5–15%) often promotes bigger leaf area. - Fruiting crops: broader spectrum with significant red, moderate blue (10–20%) and some far‑red can improve canopy photosynthesis and flowering. Recent research supports including far‑red (700–750 nm) for whole‑canopy effects, but product specs may report only 400–700 nm. Use fixtures that provide a full, measured spectrum or a white LED with published PPFD/PPE data.
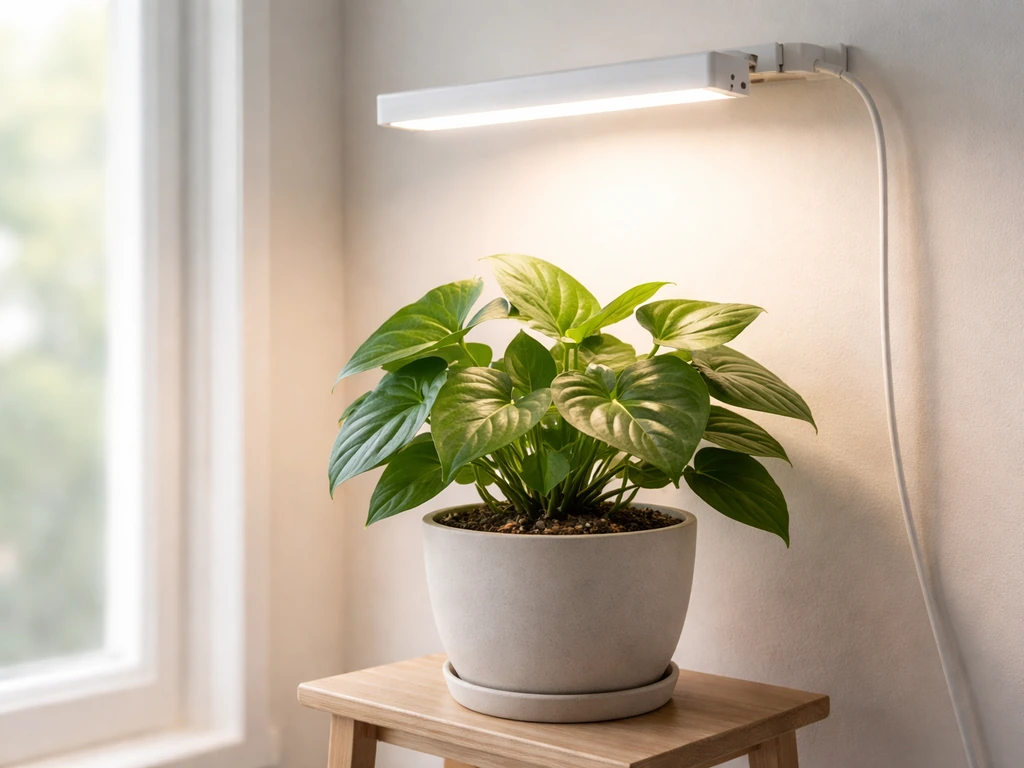
Step-by-step LED grow light setup for indoor plants: placement, height, schedule, intensity, safety, and DIY tips.
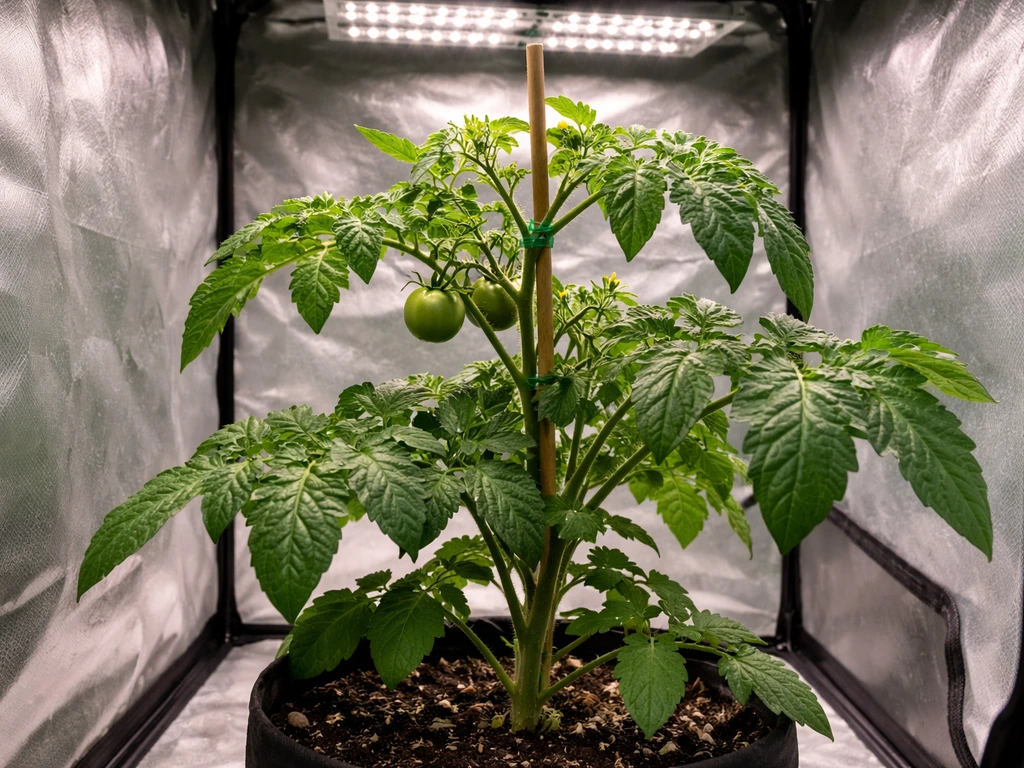
Yes, grow tomatoes indoors with LED grow lights: setup, light specs, care steps, and troubleshooting for harvest results
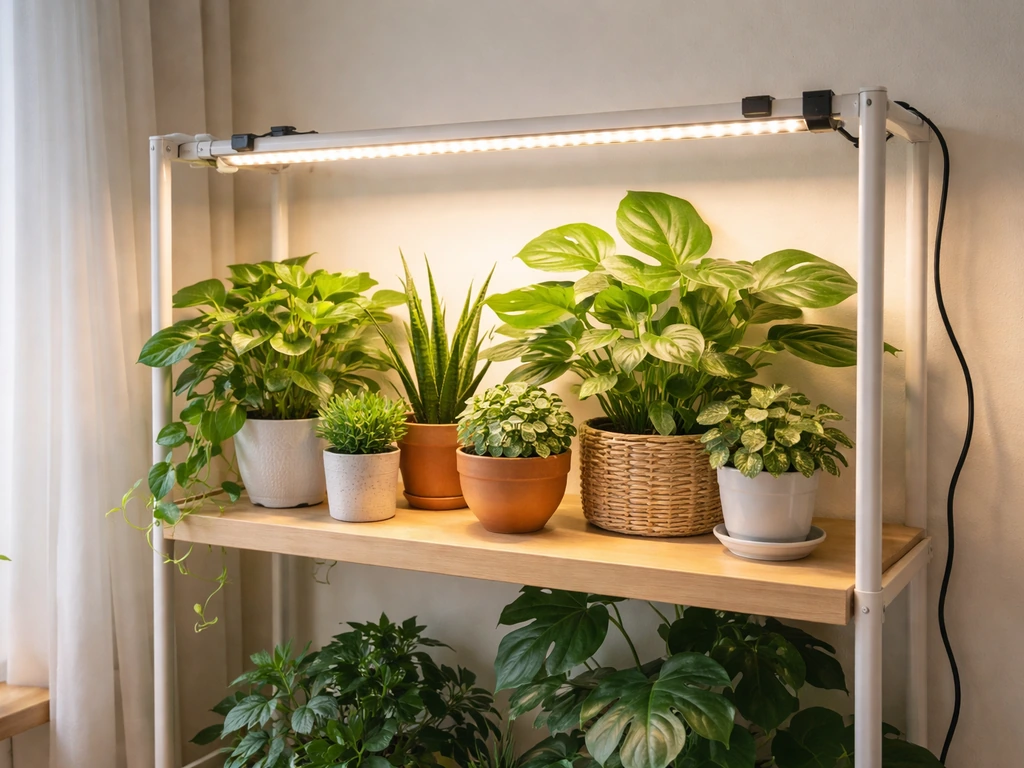
Step-by-step guide to set up and use grow lights indoors, including placement, timers, schedules, and safety tips.