Yes, grow lights can burn seedlings, but it almost never happens out of nowhere. The damage comes from two things: too much light intensity hitting the leaves (photodamage), or the fixture running so hot that it scorches leaf tissue directly. Modern LEDs rarely cause the second problem, but they can absolutely cause the first if you hang them too close or run them too long. The good news is that both are easy to avoid once you know what to watch for and what numbers to aim for.
Can Grow Lights Burn Seedlings? LED Safety, Distances & PPFD
Marcus Holloway
30 Jul 2026
Short verdict: can grow lights burn seedlings?
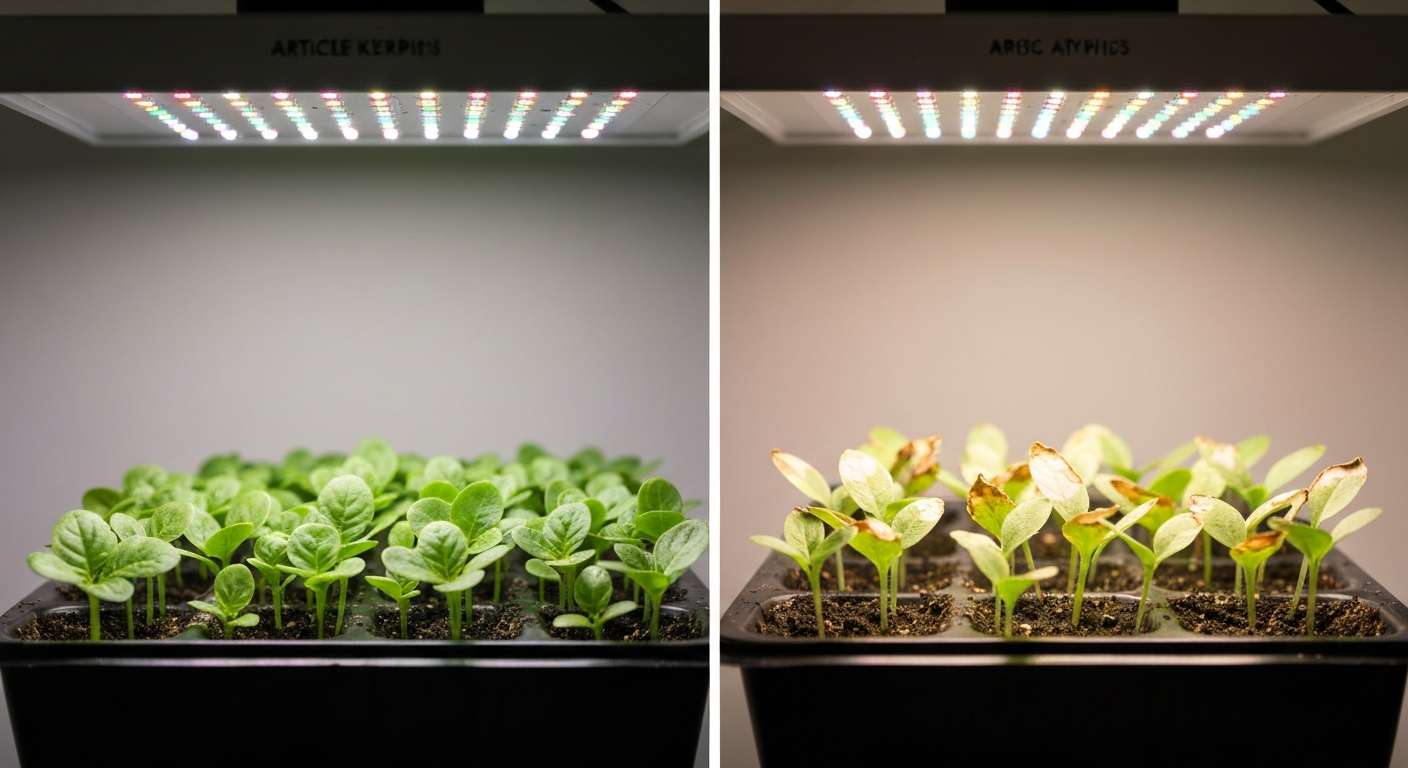
They can, but it is not a reason to be afraid of using them. Seedlings are more sensitive than mature plants because their leaves are thin and their photosynthetic machinery is still getting calibrated. Two separate things get labelled as 'burning' and they need different fixes. The first is thermal burn: the leaf or canopy surface gets physically hot enough to cause necrosis, which used to be common with HID and incandescent fixtures. The second is photodamage, specifically photoinhibition or photobleaching: light intensity overwhelms the plant's ability to process photons, leading to bleached or white patches on leaves even when temperatures feel perfectly reasonable. With LEDs dominating the home market now, thermal burn is rare, but photodamage is genuinely common because people assume a cool-running fixture is a safe fixture. It is not automatically safe at high PPFD levels.
How grow lights actually cause damage
Too much heat
Horticultural literature generally treats leaf temperatures at or above 35°C as heat stress territory. Studies on seedling tissue have documented visible foliar necrosis after sustained exposure to leaf temperatures in the 40-45°C range. With older-style fluorescent T5 tubes or HID fixtures, keeping lights too close raised canopy temps quickly. The fix was simple: maintain enough distance for air circulation, and never let leaves touch the fixture. With most modern LED panels, this is less of an immediate concern because the diodes emit very little radiant heat downward, but it is worth feeling the canopy air with your hand anyway if your growing space is enclosed.
Too much light intensity (photoinhibition and photobleaching)
This is the mechanism most home growers overlook. PPFD stands for photosynthetic photon flux density, measured in micromoles per square metre per second (µmol·m⁻²·s⁻¹). When PPFD at the canopy exceeds what the seedling can process, the photosynthetic system gets overwhelmed. The result is photoinhibition, a temporary or permanent reduction in photosynthetic efficiency. Push it further and you get photobleaching, where chlorophyll is degraded and you see whitened or pale patches on the upper leaf surfaces. Research on tomato seedlings has found irreversible photosynthetic inhibition when high PPFD combines with elevated temperature, which means even a modest 25°C canopy temp can become a problem if your fixture is cranked up and running for 18+ hours. The damage is not hypothetical; I have bleached an entire flat of basil seedlings in under a week by hanging a new LED panel at the manufacturer's recommended height for mature plants without dimming it down.
Spectrum and duration
Spectrum matters more than most beginners expect. High blue-photon fractions suppress stem elongation and create compact seedlings, which is usually what you want, but spectrum also interacts with PPFD and developmental stage to affect how much stress the plant experiences. UV-heavy spectra increase photoprotective pigments but can stress young tissue if the plant has not had time to acclimate. Duration adds up through a metric called DLI (daily light integral), calculated as: DLI (mol·m⁻²·d⁻¹) = PPFD × hours × 0.0036. A fixture running at 400 µmol·m⁻²·s⁻¹ for 18 hours delivers a DLI of about 25.9, which is far too high for a tray of two-week-old tomatoes. Dropping to 250 µmol·m⁻²·s⁻¹ for 16 hours gives a DLI of 14.4, which sits comfortably in the safe zone for most vegetable seedlings.
Recognizing burned or light-stressed seedlings
Light damage has a pretty recognizable look once you know what you are seeing, but it does overlap with a few other problems. The key difference is location: light and heat damage starts on the surfaces and tips most exposed to the fixture, not at the roots or lower stem.
| Symptom | Likely cause | Key distinguishing detail |
|---|---|---|
| Bleached or white patches on upper leaf surfaces | Photobleaching from excess PPFD | Appears on leaves closest to light; lower leaves unaffected |
| Tan or brown crispy leaf tips and edges | Heat scorch or photobleaching | Starts at margins; upper leaves worst affected |
| Yellow leaves with brown centres | Could be overwatering or nutrient deficiency | Pattern is more uniform across the plant; not confined to light-exposed leaves |
| Leggy, pale, stretched stems | Not enough light (opposite problem) | Seedlings lean toward light source; thin internodes |
| Wilting despite moist soil | Heat stress or root/fungal issue | Check canopy temp; also check for damping-off at the soil line |
| Dark collapsed stem at soil level | Damping-off (fungal) | Nothing to do with light; fix air circulation and watering |
When I suspect light damage, I do a simple test: raise the fixture by 15-20 cm and wait three to five days. UC Master Gardener guidance recommends raising lights if seedlings bleach and hardening off seedlings before transplant (Seed Starting Is Easy!, UC Master Gardener / UC ANR guidance) Seed Starting Is Easy! — UC Master Gardener / UC ANR guidance (raise lights if seedlings bleach, harden off before transplant). If the new growth comes in healthy and the damage stops spreading, light intensity was the problem. If damage continues or follows a different pattern, I look at watering, soil, and nutrients instead.
LED-specific considerations
LEDs changed the home growing game significantly because they run cool and use far less electricity than HID or T5 fluorescent setups. But the 'cool-running' reputation creates a false sense of safety. A quality LED panel can deliver 900-1000 µmol·m⁻²·s⁻¹ at 30 cm from the canopy, which is more than three times what a young seedling needs and enough to cause irreversible photoinhibition, especially if temperatures creep up. A controlled study titled "Optimization of Photosynthetic Photon Flux Density and Light Quality for Increasing Radiation‑Use Efficiency in Dwarf Tomato under LED Light, (study reporting growth responses across PPFD levels)" reported diminishing returns and signs of photoinhibition at very high PPFDs (around 900–1000 µmol·m⁻²·s⁻¹) Optimization of Photosynthetic Photon Flux Density and Light Quality for Increasing Radiation‑Use Efficiency in Dwarf Tomato under LED Light — (study reporting growth responses across PPFD levels). Research on tomato seedlings has specifically documented this combination as damaging.
Fixture variability is also a real issue. Budget LED panels often have poor PPFD distribution, with very hot spots directly under the centre of the fixture and much lower readings at the edges. This means a flat of seedlings under one panel can have plants at 350 µmol·m⁻²·s⁻¹ in the middle and 80 µmol·m⁻²·s⁻¹ at the corners. Rotating trays every few days helps even this out. Many manufacturers now publish PPFD maps for their fixtures (Mars Hydro, for example, includes these in their manuals), and those maps are worth checking before you mount anything. The general guidance from most manufacturers is to mount consumer panels higher for seedlings than for mature plants, and to use a dimmer if the fixture has one.
Spectrum from LEDs also tends to be more precise and intense in specific wavelength bands compared with broad-spectrum fluorescents. Red/blue LED mixes used in published studies on lettuce seedlings showed good results at around 200-250 µmol·m⁻²·s⁻¹ with 16-hour photoperiods, producing compact, vigorous seedlings without bleaching. Full-spectrum white LEDs are generally more forgiving for beginners because the energy is spread across the spectrum rather than concentrated in narrow bands.
Do grow lights help germination and rooting?
Seeds generally do not need light to germinate; most vegetable seeds germinate in darkness given the right temperature and moisture. Light becomes important once the seedling emerges and the cotyledons open. At that point, having grow lights on ensures the seedling does not stretch toward a distant window and become leggy before it even develops its first true leaves. So the question of whether to use grow lights during germination is really two questions: during actual germination (before emergence), light is optional; immediately after emergence, light is important. For more detail on timing and best practices, see do you use grow lights during germination. For a detailed discussion on whether and when to use lights during germination, see Should I put grow lights on seeds Should I put grow lights on seeds?. See the section “Do grow lights help germination and rooting?” for a concise answer to whether grow lights help seeds germinate. If you are already asking whether seeds will germinate under a grow light, the answer is yes, they will, as long as the surface temperature stays within the seed's germination range. For a focused discussion, see can you germinate seeds under grow light. Will seedlings grow under LED lights? Yes, seedlings will grow under LED lights as long as the canopy temperature and light intensity are appropriate for the species and stage.
For rooting cuttings, the light requirement is lower than for seedlings developing under full photosynthesis. See “Do grow lights help cuttings root” for detailed guidance on appropriate light levels, timing, and humidity during propagation. Cuttings have no root system to support them initially, so very high light can cause wilting stress before roots form. A PPFD in the range of 50-150 µmol·m⁻²·s⁻¹ is appropriate for most softwood cuttings in propagation. Once you see root emergence and new growth, you can gradually increase light levels toward the seedling range. This connects closely to how you would handle rooting under a grow light in general: lower intensity, more humidity, and a gradual ramp-up.
Placement and direction: above, below, or beside?
For seedlings, the overwhelming default is toplighting: the fixture hangs directly above the tray. This matches how sunlight works and is the safest, most predictable setup. However, there is a legitimate use case for under-canopy or interlighting, which is well-studied in commercial greenhouse settings for crops like cucumber and tomato, where dense foliage blocks light from reaching lower leaves. In a home seed-starting setup, you rarely have that problem because seedlings are small and the canopy is open. Positioning a light underneath seedlings or at a very oblique angle does not help them and can confuse the plant's directional responses, since stems and leaves orient themselves relative to the light source.
If you are starting seeds on multiple shelves of a rack, the grow light for one shelf can serve as a sort of supplemental under-canopy light for the shelf above, which is a common and practical setup. Just keep in mind that the upward-reflected far-red light alters morphology and can cause stretch in some species. For typical home seed starting, hang your fixture above, keep it centred over the tray, and you will be fine.
Step-by-step setup for seedlings
1. Measure first, mount second
The most reliable way to set up a grow light for seedlings is to measure PPFD at canopy level rather than trusting wattage or marketing distances. A PAR meter (such as the Apogee PS-300 or similar quantum sensors used in published research) gives you a direct reading in µmol·m⁻²·s⁻¹. If you do not have a PAR meter, use the manufacturer's PPFD map and start at the height recommended for seedlings, not mature plants. Many consumer fixtures suggest 60-90 cm above seedlings as a starting point, which is reasonable for most full-power LED panels.
2. Target PPFD and DLI by seedling type
| Plant type | Target PPFD (µmol·m⁻²·s⁻¹) | Target DLI (mol·m⁻²·d⁻¹) | Notes |
|---|---|---|---|
| Herb seedlings (basil, cilantro) | 100-200 | 6-10 | Very sensitive; start low |
| Vegetable seedlings (tomato, pepper) | 150-300 | 8-14 | Raise gradually as true leaves develop |
| Lettuce and leafy greens | 200-250 | 11-14 | Stable at this range for most of seedling stage |
| Rooting cuttings | 50-150 | 3-8 | Lower is better until roots form |
| Seeds just germinated (cotyledon stage) | 100-150 | 5-8 | No benefit to going higher at this stage |
3. Choose the right spectrum
For seedlings, a full-spectrum white LED or a red/blue mix with a reasonable blue fraction (around 20-30% blue) works well. Higher blue content produces more compact, stocky seedlings with shorter internodes, which is usually desirable. Avoid fixtures that are entirely red (very narrow spectrum) for seedlings because the lack of blue tends to cause stretch. UV-heavy fixtures are not necessary for seedlings and add stress without clear benefit at this stage.
4. Safe starting distances by fixture type
- T5 fluorescent (4-bulb, full-length): 5-15 cm above the seedling canopy
- Compact LED panel (45W-100W consumer): 45-60 cm above seedlings, dimmed to 50-75% if possible
- Full-size LED panel (200W+): 60-90 cm above seedlings, use dimmer or run at reduced power
- HID (MH/HPS): rarely ideal for seedlings; if used, keep at 90+ cm and monitor canopy temperature closely
Timing and schedules: how long to run lights
The standard recommendation from university extension resources for vegetable and herb seedlings is 14-16 hours of light per day. This matches the DLI ranges in the table above when combined with moderate PPFD. Running lights for 18 hours or more is rarely beneficial for seedlings and pushes DLI into ranges that stress rather than help them. I use a simple outlet timer set to 16 hours on and 8 hours off, starting from the moment the first seedling breaks the surface.
As seedlings develop their second and third sets of true leaves, you can start increasing PPFD rather than duration. Raising the DLI gradually as the plant matures is the correct approach. Do not just crank the light up suddenly; a 20-30% increase in intensity over a week is a reasonable ramp rate.
Acclimating seedlings to stronger light
Whether you are moving seedlings from low-light conditions to a stronger grow light, or eventually hardening them off before transplanting outdoors, the principle is the same: gradual exposure prevents shock. Extension guidelines recommend a hardening period of around 7-14 days before transplanting, starting with short periods in sheltered or dappled light and increasing daily. Abrupt exposure to full outdoor sun or a full-power grow light can cause exactly the bleaching and necrosis described earlier, even in otherwise healthy seedlings. Inside, a simple approach is to raise your fixture to its lowest-intensity position for the first week, then lower it progressively over the following week until you reach your target distance.
Quick troubleshooting checklist
- White or bleached patches on upper leaves: raise the fixture 15-20 cm and check if new growth comes in clean
- Crispy brown leaf tips and edges: check canopy temperature (aim below 30°C) and reduce PPFD
- Leggy, stretching seedlings despite lights on: light is too far away or intensity is too low; lower the fixture or increase intensity gradually
- Uneven growth across the tray: rotate the tray 180 degrees every 2-3 days to compensate for PPFD hot spots
- Damage appears at soil level, not on leaves: this is likely damping-off, not a light problem; improve air circulation
- Seedlings wilting despite moist soil: check if canopy temp is too high; improve ventilation in the growing space
FAQ
Short verdict: can grow lights burn seedlings?
Yes. Grow lights can damage or “burn” seedlings two ways: thermal injury from high leaf/canopy temperatures and photodamage (photoinhibition/photobleaching) from excessive light intensity or inappropriate spectrum. LEDs produce less heat at the fixture but can still cause photodamage if PPFD or exposure time is too high or seedlings aren’t acclimated.
How do grow lights actually cause damage? (mechanisms)
Two main mechanisms: 1) Heat damage — direct heat or raised leaf temperatures cause tissue scorch and necrosis when leaves reach stressful temperatures (often ≥35 °C and severe damage with prolonged exposures near 40–45 °C). 2) Photodamage — too high photosynthetic photon flux density (PPFD) or too much high‑energy light (e.g., intense blue/UV) can overwhelm photoprotection, causing chlorophyll bleaching, reduced photosynthesis (photoinhibition) or permanent damage. Damage risk is highest when high PPFD coincides with elevated temperature.
What visible signs indicate seedlings have been burned or stressed by lights?
Common signs: - Bleached, white or pale patches on upper leaf surfaces (photobleaching). - Brown/tan necrotic spots or scorched tips and margins (heat scorch). - Thin, transparent or papery leaves where chlorophyll is lost. - Stunted growth, slow recovery, or leaf drop following exposure. - Excessive compactness or abnormal morphology can indicate spectrum or light stress rather than burn. Compare with nutrient, water, disease issues—light/heat damage usually starts on the top leaves and is symmetric under a single light source.
How do LED lights differ from fluorescents or HID regarding seedling burn risk?
LEDs run cooler at the fixture and waste less energy as heat, lowering contact-heat and proximate scorch risk. However: - High‑power LEDs focused close to seedlings can produce very high PPFD causing photoinhibition/photobleaching. - Some LEDs have strong blue or narrow spectral peaks that affect morphology and photoprotection. So LEDs reduce thermal risk but do not eliminate photodamage risk; measure PPFD at the canopy and follow manufacturer mounting/dimming advice.
What PPFD and DLI ranges are safe and effective for seedlings?
General horticultural guidance: - Seed starting / very young seedlings: 100–200 µmol·m⁻²·s⁻¹ PPFD. - Older seedlings / vigorous growth: 200–300 µmol·m⁻²·s⁻¹. - Leaf‑crops like lettuce often perform well at ~200–250 µmol·m⁻²·s⁻¹ with ~16 h. Convert to DLI: DLI (mol·m⁻²·d⁻¹) = PPFD (µmol·m⁻²·s⁻¹) × hours × 0.0036. Example: 200 µmol·m⁻²·s⁻¹ × 16 h ≈ 11.5 mol·m⁻²·d⁻¹. Avoid routinely exposing seedlings to PPFD routinely above ~300–550 µmol·m⁻²·s⁻¹; very high PPFD in the 900–1000 range risks photoinhibition, especially with warm temperatures.
Practical light durations (photoperiod) for seedlings and germination
Typical recommendations: - Germination: many seeds germinate in darkness or low light; once cotyledons expand, provide light. - Seedlings: 14–16 hours light per day is common (some species 12–18 h). - Use 16 h as a default for vegetables/annuals; reduce to 14–15 h for very light‑sensitive species. Longer hours increase DLI without increasing instantaneous PPFD but don’t replace correct intensity and hardening.
Next Articles
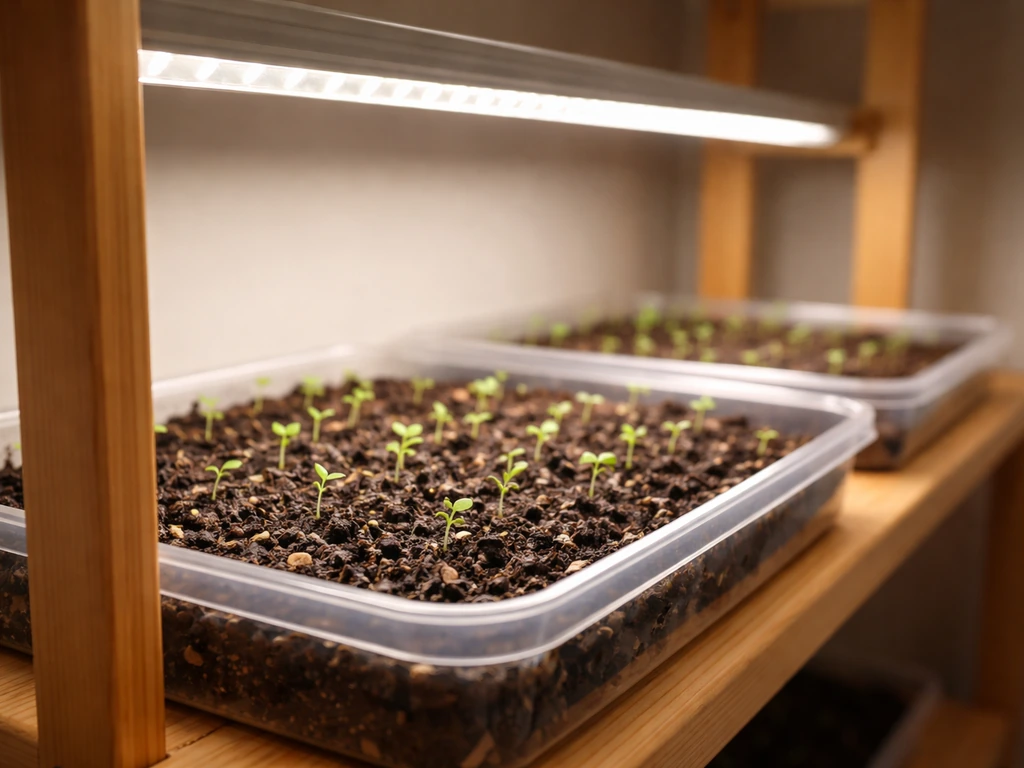
Do Grow Lights Help Seeds Germinate? Setup and Tips
Do grow lights help seeds germinate? Learn when they speed sprouting and get a step-by-step setup, distance, spectrum, h
Can You Put Grow Lights Under Plants? Yes With These Steps
Learn when you can place grow lights under plants and how to set distance, coverage, and safety for even growth.
Grow Pros Under Canopy Lights: Setup, Spacing, and Fixes
Guide to set up canopy lights: placement, spacing, height, spectrum, timers, and fixes for weak, stretched, or bleached